
Hand-Painted Plaids
- Carrie Wright

- Mar 9, 2020
- 7 min read

It's my new favorite thing to paint! So much color, so many possibilities, so much joy! If you're following me on Instagram, you've surely noticed a change in my recent work. (If you don't have/want an Instagram account, no worries: my feed appears near the bottom of my website homepage.) I recently introduced the use of soy wax into my creative arsenal thanks to a strong nudge and a few tips from a fellow silk painter in Maine who I met through Insta, Carol Sullivan of Fox Run Studios. Thank you, Carol!
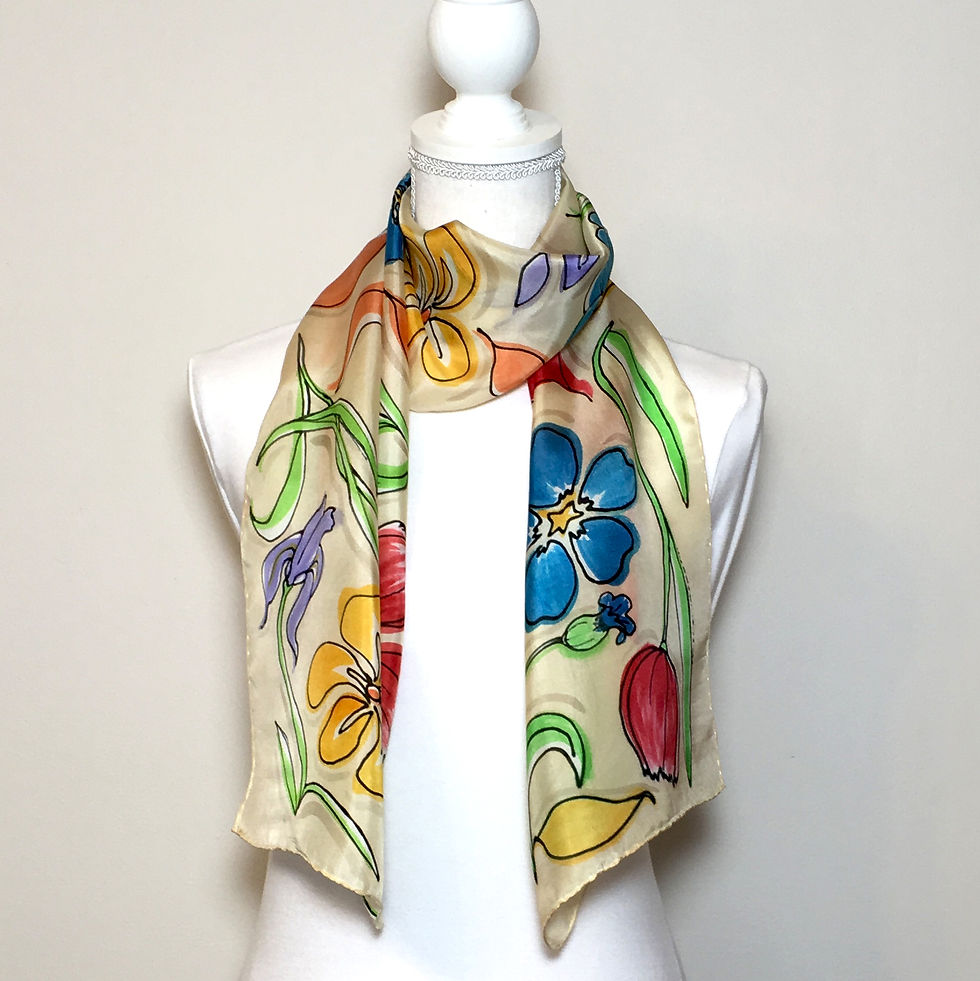
Below are a few of my recent creations. The first photo is of the plaid scarf I painted on 100% silk satin which inspired the color way in the rest of this post. I captured the brush strokes the way I wanted, and the hand drawn spacing was nicely achieved, but the colors didn't turn out quite how I'd planned because I was layering on all-over color, then wax, then color, etc. The middle navy scarf was a fun exercise in layering on color light to dark while playing with some gutta mixed in as well. This became a strategy I've returned to a few times now with great results. Using the gutta as a more controlled and dyeable illustration tool than the wax mixes together my desire to have some freeform movement alongside graphic elements in my designs.


The third photo above is of the sarong which unlocked a new door for me. Light and breezy, it was my first experience painting 5mm silk habotai, a silk so thin it reminds me of tissue paper yet with a mesmerizing shimmer. I created this plaid with a different layering strategy starting first with dye lines drawn directly onto the white silk with no resist. I measured nothing, a brave, or perhaps very ignorant, approach when dealing with a piece of fabric that is 36"x88", and wasn't sure exactly where I was headed when I started out. My idea was that if I painted on the dye first, then applied wax in a more careful way over the dye, that when the final overall color was applied, I would end up with a nice outline of brush strokes beside and at the edges of my wax lines.* And it did work out just exactly that way! Below is a photo of the line colors and pattern I ended up creating along with some of the wax already applied. You will noticed I intentionally leave brush strokes in my wax. This is what gives the piece the very free, hand-painted expression I desire.

When this piece came out of the steamer, I knew what I had to make next. I asked my artist husband to talk me down off the ledge, but as usual, he just poured more fuel on my fire! I'd been considering making a show-stopper sort of piece for the upcoming 10th Annual Indiana Artisan Marketplace, but hadn't settled on anything in particular mainly because I am well-aware high ticket items are hard to sell. I'm running out of making time and wasn't sure it was wise to spend my energy trying to create a "wow" piece, not to mention the fact that I am unfortunately still susceptible sometimes to feeling deflated by having pieces I love completely overlooked by shoppers. Seeing that plaid on the 5mm habotai, though, it just had to be done: a full length summer ball gown skirt with a white silk satin underlay.
But how to create this so the plaid pattern could sing across the seams without becoming a jumbled mess? Matching the lines of a hand-painted plaid fabric sounded if not impossible, at least utterly joyless to me to try to make.
Thankfully, I already had 5 yards of 36" wide 5mm habotai on hand, which I had ordered to use on some mobiles I have in mind; so I cut that up into a very simple skirt pattern that would make the best use of the narrow fabric. I sewed the front and back of the skirt pieces using French seams. I was much more intentional with my plaid pattern this time and meticulously measured and marked each line using a disappearing ink fabric pen. I wanted the plaid to flow down the length of the skirt and expand as it reached the floor so there could be a single iteration of the overall pattern on the front as well as one on the back. The front and back are virtually identical, but when I measured the back to mark lines, I made note of where the horizontal lines connect on the side seams. It was a long shot, but I hoped this would help me match the pattern after the front and back separate pieces were stitched together.
Now with the lines drawn, I spread cut up trash bags onto the dining table, my largest- yet often not large enough- work surface in the house, placed the skirt front on the bags and started carefully painting on my dye colors. It was very scary at first. I hate painting this way. Dye behaves much more dutifully when the silk is suspended so the dye can flow freely. I don't like working messy either, and this is a very messy way to work! I had no choice, though. The 5mm silk was too delicate to trust stretching it now that it was in the odd shape of the skirt. Any stress on the stitched seams could cause a tear. I painted the lines on the front piece, let it dry as it lay on the plastic, then did the same for the back piece, but flipping over the trash bags first just in case any dry dye on them might bleed back to life in an area in which I didn't want it. Finally, I went to bed!
Up early the next morning, I was flummoxed by how I was going to draw clean wax lines. The trash bags are too uneven and messy to get a good straight line drawn onto the silk, and I didn't want to have to clean wax off of the top of my table. (Yes, I considered it!) I tested a small piece of silk scrap laid on top of newsprint paper in hopes the wax wouldn't cause the silk to stick to the paper. It worked perfectly, which all of you wax users out there already would've known, so I laid out newsprint and went to town with the lines. Oh, it was very nerve-racking! I was far enough into the process that the idea of ruining all the work loomed in the back of my mind. Several prayers went into this project before I realized that it was already looking beautiful and could be used in mobiles regardless!


I still had the background main color to apply, what I have come to think of as the final toner for plaids painted with this strategy. I didn't want to end up with a crackle effect in my wax lines, a sometimes desired effect achieved by intentionally creating breaks in the wax into which dye can seep. I flipped the skirt pieces upside down- last photo above- so that I could very carefully peel the paper off of the fabric thereby minimizing how much the wax was disturbed. Afraid the dye wouldn't puddle against the wax lines if the silk wasn't suspended (see *Pro Tip below), I pressed my cloth hamper stand into service draping the silk across it. This worked just fine, although again, it was very messy. Thankfully, I have a husband who doesn't mind finding my random carnage of art projects left about on inconsequential pieces of functional household items!


With everything painted, waxed and painted some more, I let the silk sit overnight, then steamed it up the next morning. Once successfully out of the steamer, I knew I had a winner! I decided to sew this to fit me in case it doesn't sell. I didn't want to hem it too short in order to make it more marketable, and I didn't want to make it too small either as it can always be altered down a size or two. You can see in these photos that I don't have the right smart tee to go with it, and I had to wear my tallest platform sandals to keep it from dragging the floor. It will be much dressier with a lycra white or black top and strappy heels! I wish I could impart to you the amazing shimmer it has. You just have to see it in person. It is light as a feather and feels softer than the plushest blanket you've ever touched- pure joy-filled luxury!


My side seams mostly matched up, enough so to not be a distraction!


All in all, I think this is something I'd be delighted to become known for because I have a jillion different colors and patterns in mind and nobody for whom to paint them. Maybe I'm an odd-ball and nobody else would want to look like this at dinner, but what can I say except, "I am in love, and I make what I want to wear!"
*PRO TIP: The pigment in dyes will concentrate at their drying edge after the first application. If dye has already been applied to the silk, and then an illustration edge is created with wax or some other resist, and then another layer of dye, or even just water, is applied to the painted area, you can achieve a beautiful halo effect at the edge of the resist line. I've used this strategy in my work for years to add a subtle depth and beauty to my illustrations, so I assumed the same would happen with the introduction of wax to my process. Sure enough, wax brush strokes can become strikingly highlighted as a slightly darker very thin line of pigment is produced at the transition edge. I believe, however, that the dye does need to flow and dry freely across the silk for this effect to be maximized, which is why I took extra care to suspend the silk over my hamper legs while I painted the toner layer of dye on the plaid.


Stunning!! Very nice work.
Just discovered you via YouTube, and am having fun learning/reading your Journal now! Thanks for all you're sharing!